|
|
Friday, July 24, 2026
|
|


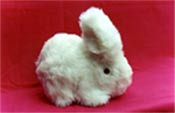
Soft Toy - Rabbit |
|
Picture Gallery |
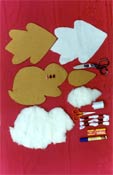 Materials Required
Method
 The designs of the body, ears
and the base needed to make a rabbit is given below. You must draw bigger
versions of the designs as required.
The designs of the body, ears
and the base needed to make a rabbit is given below. You must draw bigger
versions of the designs as required.
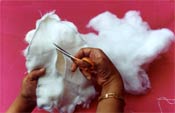
 The unstitched part of the
body is fixed on to the base. Thus you get a sitting rabbit.
The unstitched part of the
body is fixed on to the base. Thus you get a sitting rabbit.

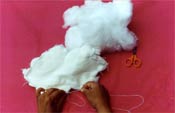
 Using this cut, reverse
it, (pull the right side out) to get the right side outside. Now fill
in the fibre cotton and close the slit.
Using this cut, reverse
it, (pull the right side out) to get the right side outside. Now fill
in the fibre cotton and close the slit.