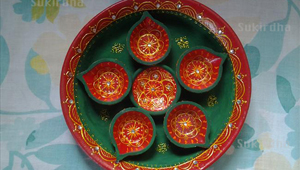
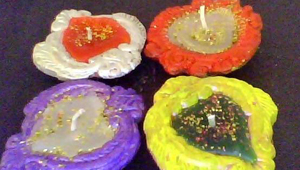
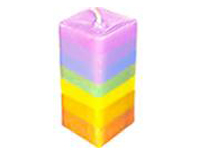
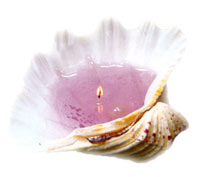
Gel candles are easy to make. They are gaining popularity as they burn longer than wax candles. You can try out different ways to make beautiful 3D effect candles making layers or adding embeddings in glass containers or any other translucent container. Decorate your home with these beautiful candles made on your own.
| |
| |
Method II
Materials
-
Gel Wax
-
Candle Scents (strictly only one or two drops, otherwise it may ignite the whole surface of the gel when you light them)
-
Candle dyes
-
Wicks
-
Wick Base
-
Glass container
-
Embeds (as per your choice)
Method of preparation
-
Select the right glass or non-flammable container for your gel candle.
-
Stick one end of the wick by a wick base or glue in the container. Suspend the wick vertically in the container by tying it to a split cane or a toothpick.
-
Melt the wax in a double boiler or in a bowl over a pan of simmering water. The gel wax may take more time for melting than paraffin wax.
-
Add the required colour. Only liquid colour is recommended for optimum effects. Water-base and paste dyes won't mix, and color blocks used for regular wax candles may make the gel cloudy. You will want to add your color and scent fairly quick because the gel will start to set rather fast.
-
Pour the wax into the container as if you're pouring beer - down the side to prevent bubbles. The higher the pouring temperature, the fewer bubbles. Sometimes you want bubbles for effect, in which case you should let the gel cool before pouring. Gel does not shrink so it will not require a re-pour.
-
Pull the wick up straight and center it.
-
Once candle is fully cooled down it will be ready to burn.
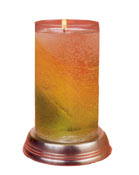 Layers Layers
You can create all kinds of interesting looks by pouring different colours of gel on top of each other. Allow each layer to completely solidify before pouring next. You can make angled layers by keeping the container at an angle when it is placed for cooling.
Embeds
 One can find a craftsman's creativity in making a gel candle from the way of embedding. Take care while choosing items to embed. It is important to take care that only non-flammable items be used as decorative embeds in gel candles. Items such as seashells, glass figures or marbles, sea glass, stones, ceramic figures and wax embeds are fine in gel candles. Sand is often used in the bottom of the popular seascape gel candles. Silk flowers and foliage is also make great choices for gel embeds. If you are tempted to use a flammable items in gel candle, use a short wick which will never burn near these items. One can find a craftsman's creativity in making a gel candle from the way of embedding. Take care while choosing items to embed. It is important to take care that only non-flammable items be used as decorative embeds in gel candles. Items such as seashells, glass figures or marbles, sea glass, stones, ceramic figures and wax embeds are fine in gel candles. Sand is often used in the bottom of the popular seascape gel candles. Silk flowers and foliage is also make great choices for gel embeds. If you are tempted to use a flammable items in gel candle, use a short wick which will never burn near these items.
Tweezers and cooking skewers can be used as embedding tools to place the items and to reposition the embeds. If you want your embeds to be in an exact position in the gel candle, suspend them in the container with the help of a sewing thread. Usually readymade embeds contain holes to pass the sewing thread. After the gel has finished solidifying, you can remove the strings by gently pulling on them.
Opaqueness
If you prefer your gel candle to be more dense, add crayons instead of gel candle dye. Another method is to fold the gel repeatedly over as it cools with a butter knife. Transfer the gel to the container when it starts to become stiff to handle.
Bubbles a candle's design theme.
Bubbles are nice to look at, but not for all candles. In some pieces with embeddings where the clarity is important, bubbles become unwanted.
Bubbles are caused by three things:- The heating temperature of the gel, reactions between the gel and items in your candle and the way of pouring the gel.
To reduce bubbles
-
 Preheating the container for at least 10 minutes, before pouring the gel is an easy way to reduce the bubbles. Just put the container in the oven or let it boil for sometime. Preheating the container for at least 10 minutes, before pouring the gel is an easy way to reduce the bubbles. Just put the container in the oven or let it boil for sometime.
-
Heat the gel to the highest temperature permitting at least some of the bubbles to rise to the surface and break. (when heating the gel to the highest temperature, always be careful and be attentive as just a few minutes of distraction can easily cause a grease fire)
-
Pre-treat the embedding items - Place the embedding items in a pan with a small amount of gel. Using a tweezer carefully remove the items, holding them over the pan until the gel solidifies.
-
Try to pour the gel at an angle or down the sides of the container, to minimize the bubbles
-
Dip the wicks in some melted gel
-
Stir the gel with a bubble stick
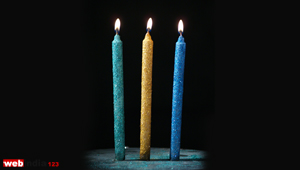
Wick
Wax coated wicks will be stiff and burn well. If you are using the candle for lighting, it is advisable to use short wick so that the embeds in the candle don't get burned. Take care to trim one forth inch of the wick each time after burning or the residue from the burning wick may ruin your candle by making a pool inside and discolouring it.
|
|
| |
23 Comments |
|
Mrs Priya A Mhatale, Mumbai | October 30, 2014 | Reply | | so nice to learn about candle and there seafty and i making a candle for seal. | |
|
| |
Aresha, Hyderabad | June 11, 2014 | Reply | | Very beautiful candles | |
|
| |
Bharathi, Chennai | February 2, 2013 | Reply | | So easy,i used it | |
|
| |
Aastha, Hisar (Haryana) | April 15, 2012 | Reply | | Thanks! I am interested in these things | |
|
| |
Anthony Chitra, Chennai | February 25, 2012 | Reply | | Very useful & helpful tips...Thanks... | |
|
| |
Rama, Southafrica | October 25, 2011 | Reply | | Simple method for beginners....Thanks | |
|
| |
kiran, jodhpur india | May 7, 2011 | Reply | | excellent..... something i was looking for! | |
|
| |
amrutha, bengalore | April 15, 2011 | Reply | | i am very curious about candel making . so help me by sending any guidence
| |
|
| |
pr dutta, chandigarh | April 2, 2011 | Reply | | excellent,can u guide more,your endevour is marvellous | |
|
| |
veena misra , gurgaon | February 4, 2011 | Reply | | it is easy to make candle ,i read mathod to make candle , i will try. thanks | |
|
| |
nanda, koramangala | January 29, 2011 | Reply | | very well explained. useful for trying ourselves.thanks. | |
|
| |
john, eastanollee, ga | December 6, 2010 | Reply | | thanks for the info | |
|
| |
Sneha Bhavan, Piravom Kerala | November 6, 2010 | Reply | | Congrats. a very informative article. we are a school for mentally challenged and we train and produce normal type of candles. Would like to add gel candles. Could you help us by the material suppliers address | |
|
| |
dheeraj, HYDERABAD ANDHRAPRADESH | November 6, 2010 | Reply | | YOUR STEP BY STEP INSTRUCTIONS ARE AWESOME CAN YOU
SEND YOUR NEW METHODS FOR ME | |
|
| |
neena Rane, Mumbai ( Maharashtra ) | October 8, 2010 | Reply | | VERY GOOD INFORMATION , GIVE MORE PHOTO-GRAPHS KEEP IT UP--- | |
|
| |
Vasu, New Delhi | September 5, 2010 | Reply | | Nice article. Would be better if you add more photos. | |
|
| |
ishan, chandrapur (m.s). | August 28, 2010 | Reply | | very good direction... | |
|
| |
sabaa, kota,rajasthan | July 29, 2010 | Reply | | nice.....thanx iwould try at home | |
|
| |
suman, jhunjhunu | July 15, 2010 | Reply | | More deatil abt Gel Canlde | |
|
| |
DIPAK BHUYAN, Khanapara, Guwahati-22, Assam | June 20, 2010 | Reply | | I interested in your product. So I want to details your candle making system. I hope your answer within sort time. | |
|
| |
Hema, india | May 1, 2010 | Reply | | The candle making method described here was very useful and also very clear.thank you | |
|
| |
Rajiv Ranjan Prasad, Rourkela | April 23, 2010 | Reply | | Where I can get the materials to make gel candle ?
Please email to above noted email address. | |
|
| |
Nimali, colombo - sri lanka | April 23, 2010 | Reply | | need to get candle making methods and where we can get materials in sri lanka and what r the desings .. | |
|
| |