|
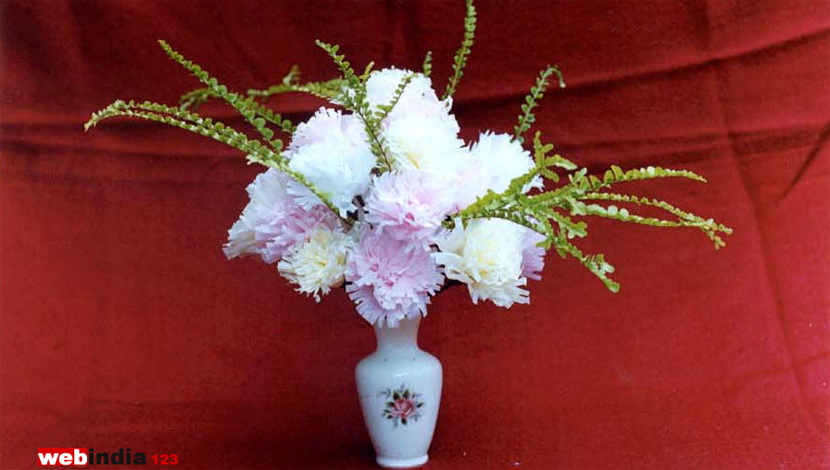
Different Types of Flowers
Pleated Flowers | Daisies | Cosmos | Cabbage Rose | Party Rose
Materials: The basic materials needed are tissue paper in vivid colours, wire for flower stems and to secure petals, crepe paper to wrap the flower base, stem and to make leaves, Glue and scissors.
Wire comes in different thickness or gauges. 12 or 14 gauge which is rigid and heavy are used for stems of large flowers, 22 to 24 gauges which are lightweight are used for small flowers or curving stems. Very fine spool wire around 30 gauge is used for fastening petals to the stem wire. Commercial floral tapes or strips of crepe paper can be used to wrap the stem, and leaves can be made with either tissue, crepe or construction paper.
There are methods by which we can give a crinkled, glossy, transparent or translucent effect to the petals to make them more attractive. Dipping the petals in wax makes them translucent - gives them a semi- transparent effect. Melt wax or candle stubs in a double boiler over hot water and dip the finished flower into the melted wax and gentle shake off excess droplets of wax and allow it to harden. The petals get a glossy look when sprayed with lacquer or clear acrylic and a glasslike appearance when the finished flower is dipped in thinned lacquer or plastic resin. Each method is explained as and when they come.
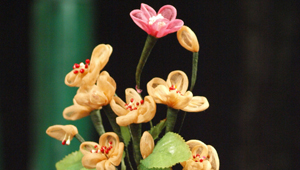
Pleated Flowers 
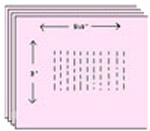
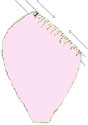
To make this flower, you can use either different colours or same colour tissue paper. Cut out 2 pieces each of the two different colours of tissue paper approximately 3 by 51/2 inches each. Stack the four pieces together and make accordion pleats i.e small pleats as shown by dotted lines in figure down the center of the strip. |
 |
Twist a wire around the center firmly. Hold the wire vertically and fluff out each of the layers. For a vibrant effect, alternate layers of different coloured tissue papers can be used. |
 |
Top |
Daisies
|
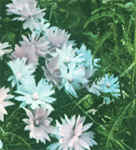 |
You can use violet or pink shades of tissue paper to make daisies. |
Flower Center : Make a flower center by looping stem wire over a small ball of cotton and covering this with a circle of coloured tissue paper. |
 |
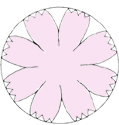
Flower : Cut out circles of 2 inch diameter to make flowers. Two circles are needed to make one flower. Fold the circle of tissue paper in quarters as shown in figure, and cut in equal measures around the folded edge to separate the petals of the flower. Shape the edges of the petals with scissors. Your flower patterns are ready. |

|
 |
 |
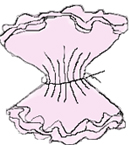
Procedure : Thread two of the petal shapes onto the wire and glue to the flower center, crushing the base slightly to give added shape. Wrap the stem with tape. |
|
| Top |
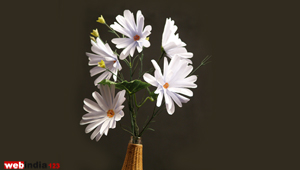
Cosmos
|
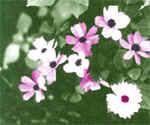 |
For making cosmos flowers choose tissue paper with colours such as a pink, rose, light purple, and white. You can make as many flowers you desire and arrange it with real leaves to have an original effect.
|
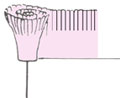
Flower Centre: Fold a strip of tissue paper in half length wise , then fold into thirds for fringing. Slash or fringe the folded edge with scissors at even intervals. Make a crook in a piece of stem wire and draw it through one end of the fringed paper to make sure it cannot slip. Wind, using dabs of glue to secure the base, until the desired fullness is reached. |
  |
|
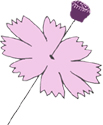
Procedure : Make a flower center of dark purple fringed tissue paper then thread a single flower pattern onto the stem and glue at the base. |
 |
|
| Top |
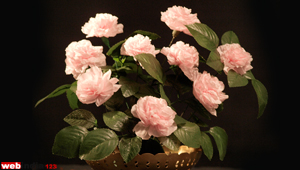
Cabbage Roses |
 |
Cabbage Roses can be made by creping tissue paper or with commercial crepe paper itself. This rose looks attractive with a fresh crinkled look. |
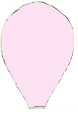
Petals : Cut out petals in the shape given in the picture. Around 10-12 pieces may be needed to make a flower. |
|
Creping the Flower :
Tissue Paper can be creped either before or after the petals are cut. There are two ways of creping - one is the rolling method and other is the hand-kerchief method. |
 |
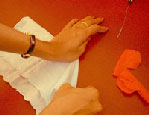
Rolling Method : Wind each petal loosely on both sides over a wooden rod (or any other round object) and use your hands for pushing the paper (crush) from the ends towards the center. |
Handkerchief method : Cut the petal and fold in half lengthwise. Place it inside a handkerchief or other light material . Using the palm of one hand to hold the base of the petals, the cloth is pulled firmly away from the centre crease. As the tissue paper is light, it may tear easily. So keep several petals together while creping. |
|
Procedure: Wrap one petal tightly around the wire to make the flower center, then continue adding petals until the desired fullness is reached. Wire the base tightly to hold the petals in place. |
|
| Top |
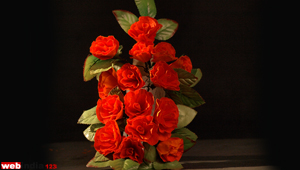
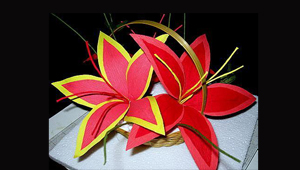
Party Roses |
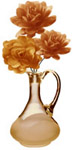 |
These are large roses which can be made very quickly and easily. They can be made more attractive using two colours such as light yellow and orange or any dark and light shades. |
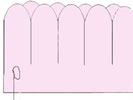
Flowers : Cut out two long strips preferably from different coloured tissue paper. Make deep scallops, on the edges with scissors. Then wind the two strips together around a piece of thick stem wire and glue it in place. Roll tightly at the center, then more loosely toward the outer folds. Gather the base and secure with spool wire, then wind floral tape or strips of crepe paper over the stem. For small roses, cut narrow strips and make scallops or cut folded paper in scallops, unfold, and wind, gathering at the base.
|
 |
|
|